

Matillion has a Git integration for Matillion ETL with Git repository providers, which can be used by your company to leverage your development across teams and establish a more reliable environment.
In this blog, you will learn how you can set up your Matillion ETL to be integrated with BitBucket and used as a Git repository for your developments.
What is Matillion ETL?
Matillion ETL is a platform designed to help you speed up your data pipelines development by connecting it to many different data sources, enabling teams to rapidly integrate and build sophisticated data transformations in a cloud environment with a very intuitive low-code/no-code GUI.

Why Does it Matter?
Connecting your Matillion ETL to BitBucket allows you to empower your solutions with all of the best Git development practices. Connecting both allows your team to work in multiple versions at the same time and collaborate easily, making your developments more reliable and allowing you to work at a more granular level with agile methodologies.
Why Use BitBucket?
Bitbucket is a worldwide Git repository management solution designed for professional teams. It gives you a central place to manage Git repositories, collaborate on your source code, and guide you through the development flow. BitBucket includes access control, workflow control, pull requests, Jira integration, and a full REST API.
How to Integrate Bitbucket with Matillion ETL
To begin the integration, you must first confirm that you have the proper BitBucket permissions granted by your organization in order to allow your user to connect applications.
If you are not the Bitbucket admin in your organization, you should contact the team in charge of managing your environment for more information on how to obtain this permission.
Configuring BitBucket
Let’s say your company doesn’t have a BitBucket Git repository and you need to create a brand new account to store the repository. Following the creation of your new account, you will be directed to a page similar to the one shown below.

On that page, click the “Create” button to open a drop-down menu with the option to start a new project. That new project will be used to help you organize your git repositories.
To do so, go to “Project” and start a new one.

The following window will be where you can do the basic configuration for your project. Once you’ve finished filling it out, click the “Create project” button.

Now that you’ve created the project, it’s time to create a new repository for your Matillion ETL platform. Within your project, you can click “Create repository,” which will take you to another interaction to create it.
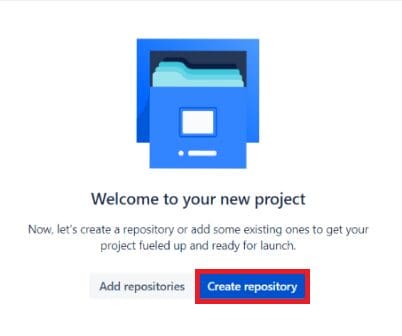
In this case, we’ll use the project we just created for the Matillion repository. The default branch will also be “Main”, but you can define any other one you believe will fit better in your project, such as “Master,” “Development,” or any other one you prefer.
Click the “Create repository” button once you’ve finished configuring the new repository.

Now that your BitBucket is ready to receive the Matillion ETL Git repository, we need to create some credentials that the platform will use.
Feel free to open a notepad and begin saving some information required for the integration later.
To start, we’ll use the URL of your new BitBucket repository to point to the Matillion ETL platform later. To do so, navigate to your Git repository on the BitBucket page and click the “Clone” button. This will launch a new window for you.

Keep the HTTPS option selected, and get the URL of your repository. The “Git clone” part will not be needed for us.

Let’s get your username now that you have the URL for your repository. Go to “Personal settings” by clicking on the account option on the right upper side.

The “Username” field can be found on the “Account settings” page. That is the one we will use when we go to Matillion ETL. Save that username along with the URL to the Git repository.

Now, let’s move on to the final BitBucket component required for the connection. For access, we need to create a new “app” that the Matillion ETL platform can use.
To do so, remain on the same page where you obtained the Username and click on the “App passwords” link on the left side. There, you will find the “Create app password” button, which will allow you to create the password that will be used with the other credentials you previously collected.

Using the “Label” field, give your BitBucket application any name you want. Grant all permissions for that application (as shown in the screenshot below) to ensure Matillion has full access to the BitBucket repository.
Click the “Create” button to finish the application creation process. A new window will appear with the password you will need for the application, but be cautious at this point. That password is only visible once, so take it and save it with the other credentials you took previously.

Configuring Matillion ETL
It is now time to go to Matillion ETL and begin integrating it with the BitBucket application that you have created. That connection will need to be made per project, so navigate to the project you want to connect it to.
On this project page, find the “Git” option by clicking on the “Project” button at the top left. This will open a new window in which you can enable Git in your project by cloning or initiating a local repository. “Init Local Repository” should be selected.

The next window will perform the initial commit, which will create your local repository. There is no need to change anything in the “Commit information” field, but you must repeat your email address in the field below to click the “Confirm” button.

That will create your local Git repository, which you will then push to your BitBucket repository. To start, we will need to navigate to the “engine” icon in the “Git Integration” window.
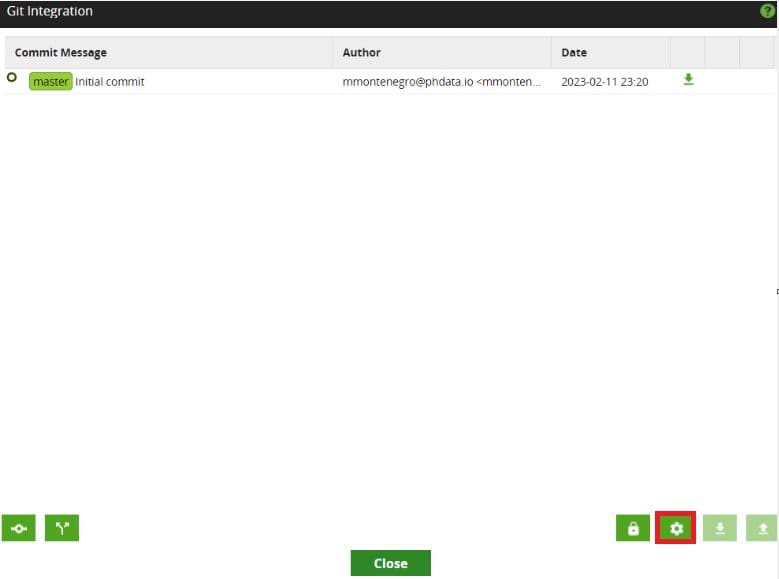
This will open a new window asking for the remote URI. That is where you will paste the repository URL you copied from BitBucket. Simply confirm it after you’ve pasted it.

Returning to the Git integration page, it is now time to log in to the remote repository using Matillion. This time, click the “Lock” icon to configure the credentials that will be used in the connection. Another window for connection configuration will appear.

Use the username and password you created earlier in the BitBucket steps. The username is the one you got from the “Account settings,” and the password is the one generated for the BitBucket application as well. The encryption type should be changed from “KMS” to “Encoded,” and then you click “Ok” to confirm.

Your Git integration is now complete. Let’s use it for the first time to push your initial commit to the remote repository in BitBucket to confirm it. To do so, click the “arrow up” icon in the bottom right corner, which will open a new window asking what type of push you want to perform. Select “Thin Push” and press the “OK” button.

You should see a new window that says “Branch master: OK,” indicating that your integration was successful because you were able to push your commits to the remote repository. If you do not receive this message at this time, please review the previous steps to ensure everything was done correctly; otherwise, you should confirm that you have all the permissions required to access Git in Matillion and BitBucket to use “apps” with other applications.

Closing
With this blog, we were able to see how to connect your BitBucket to Matillion ETL to build your Git repository. This allows you to have a more reliable development environment, ensuring that your promotion steps from development to production are more efficient, secure, and organized.
Looking for more Matillion assistance? phData excels at assisting organizations in achieving success with Matillion. Contact us today for help, advice, and actionable strategies.


