

Data Vault Modeling is a newer method of Data Modeling that tends to reside somewhere between the third normal form and a star schema. Often, building a data vault model can take a lot of work due to the hashing and uniqueness requirements. But thanks to the dbt vault package, we can easily create a data vault model by focusing on metadata.
In this blog, we’ll cover how to set up dbt vault, how to use it to generate your hashed stage tables, and how to use it to generate the various hub/link/satellite tables.
What is dbt Vault?
dbt vault is a package that you can use to easily build Data Vault models. It allows you to bring in a data source, then focus on using the metadata about that data source to generate the hash keys as well as the hash diffs. It provides built-in functions to help stage your data for a data vault and to create your hub/link/satellite tables.
What is Data Vault modeling and What is dbt?
It is important to be comfortable with both Data Vault modeling and dbt before diving further into this blog. So what do these two things solve? dbt for starters, allows you to focus on providing software engineering principles to the transformation layer of your ETL/ELT process.
It not only brings version control, but it also allows for CI/CD, modularized code, and wonderful documentation. A Data Vault model on the other hand is a newer architecture that helps you to build a highly business-focused data warehouse. If you aren’t sure about data vault modeling, you should check out our in-depth blog post that covers how to build a modern data platform with data vault.
Additionally, if you are not comfortable with dbt yet, you can also check out our in-depth setup of dbt and the Snowflake Data Cloud.
Installing the dbt Vault Package
Before we can begin using the dbt vault package, we need to set it up as a dependency within our dbt project. To do this, we can create a packages.yml file in the root of our project directory. Within that yml file, we can specify the packages that our project is dependent on, which in our case is the Datavault-UK/dbtvault package as seen below:

Once we have established the requirement of this package, we need to run dbt deps to bring in our new dependencies.
What Does our Source Data Look Like?
For this blog, we’re using some fake coffee shop data. We have tables of:
- Customer information
- Products
- Sales outlets (or stores)
- Staff we have
- Sales that we’ve actually made
All of the above tables have their own unique primary keys, while the sales table links a sale to the employee, customer, store, and product that was sold. Here’s a quick view of the source data:


Staging Source Data
So what is the first step of creating a Data Vault Model? We need to begin by staging our raw data sources. To do this, we need to create our unique hash keys and set the columns that we want to act as a hash diff column.
This can often take a lot of work to perform, but thanks to dbt vault, we can build some simple yml within our model, and then use dbt vault and Jinja to create the staged data. Here’s what that looks like for the staff data:

A lot is happening here, so let’s start at the beginning. The first piece of Jinja we use is to create the yml metadata that we will use to configure our staged data source. This starts by specifying a model, then we can specify some columns that we want to derive, then we specify the hash columns.
If you look at the derived columns, you’ll notice that the record_source starts with an exclamation mark, this is done to say that we want the record_source to be the literal string RAW_STAFF. Then we pull in the start date as the effective date, and we set the load date as the next day of the start date.
Finally, we specify a pair of hashed columns, the first being the primary key for the staff, and the second being the columns that we want to perform any diffs on.
The next set of Jinja just takes our yml and packs it into a dictionary that we can then extract into a set of variables that we want to pass to the dbtvault.stage function. Once we’ve unpacked these values, we want the stage to include all of the source columns, plus our new derived and hashed columns from a certain source model. Once this is run, you’ll get a table of the original source with derived and hashed columns added to the end of the table.
We need to go through and do this for all of the different source data sets. In our case, that meant creating a stage for:
- Customer
- Product
- Sales
- Staff
- Sales Outlet (or store)
We followed the same pattern, specifying any keys we need, new derived columns, and the hash diff column. You can see all of our staged models below:

Creating a Hub
Now that our data is staged, we can start by creating our various hubs. Again, we can do this by using some jinja to set some metadata parameters that datavault.hub can use to generate our hub table. As an example, here’s the sales hub:

What we do here is start by specifying the model, then we set our primary key as the hash field that we created. Next, we specify the unhashed fields that make up the primary key. Finally, we specify the fields that act as the load date and the record source. After we’ve done that, we can send those values to dbtvault.hub and this results in a table that has the following fields:
- Hashed primary key
- Unhashed primary key fields
- The load date
- The record source
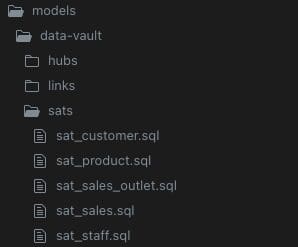
Again, we did this for all of the stages we created, as seen below:

Creating a Satellite
Now that we have all of our hubs, we want to create our satellite tables. Remember, the satellite contains the hashed primary key and all of the identifying fields. That looks something like this:

Again, we use Jinja to specify the metadata that we want to use to create our satellite table using the dbtvault.sat function. We start by specifying the source, the hashed primary key, the hashdiff field, the payload (which is just all the columns you want to be able to look at that are not the primary key), the effective date, the load date, and the source that we got the record from.
This results in a table that has our hashed primary key that we can link to our hub to view the unhashed primary key, but the satellite has the other data that is tied to that primary key. Again, every hub should have at least one satellite. Like so:
Creating a Link
Finally, all that is left is for us to generate the link tables. Link tables exist to link a pair of hubs together. In the case of our source data, the sales table had all of our links. Every sale within that table is linked to either a: customer, product, sales_outlet, or staff member. So we can get those values out of our staged sales table to generate all of the links that will tie the various hubs to their sales. That will often look like:

Again, we can focus on providing the metadata, and then the dbtvault.link function will actually generate the link table. We start by specifying our model to pull from, the primary key that we generated that is unique to the sales primary key and the customer primary key. Then we provide the foreign keys that we can use to link to the hubs.
Finally, we can provide the load date and source columns. This generates a rather small table that acts as a bridge or link between the sales and customer hubs. We will generate a link for every relationship between hubs that we have. This resulted in:

Querying Your New Data Vault Model
Now that we have created our stages, use those stages to generate our various hubs, satellites, and link tables. We can perform a dbt run or dbt build and take a look at querying our data. As a reminder, our hubs act as our primary keys, the satellites act as the actual data that the primary key represents, and the links allow us to tie hubs together.
So let’s say we want to take a look at the sales the various staff are performing. We can start at our link_sales_staff table then tie that to the staff and sales hub, and from there, we can go to the satellites to get the identifiable information about the sale or staff member.
Here’s an example of what that might look like (ignoring joining to the satellite for now):

With our new data vault model in place, it’s easy to begin to write queries to find and begin investigating the various business questions that we are presented with.
3 Tips and Reminders for dbt vault
- Remember, always start by creating your staged data
- Once you have your staged data, it is easy to create your hub and satellite tables
- Create the links between the various hub tables.
Closing
Thanks to dbt vault, it is very easy to create a data vault model by focusing on the metadata. By doing so, dbt vault is able to do the heavy lifting for you which allows us to create this data vault model in under two hours.
As you build out your data vault, it can become easier to even bring in disparate data systems, allowing each data systems elements to have its own hub/satellite tables, and then creating a link between the necessary hubs.
If you would like to learn more about data vault data models or dbt Vault in particular, feel free to reach out to phData for more information!
FAQs
Of course it is! dbt vault provides a t_link function that allows you to again focus on providing the necessary metadata and then dbt vault will generate the transactional link table for you.
The data vault model really excels at dealing with incremental data loads, allowing you to build an insert-only architecture that tracks all of your historical data. Now, this does sometimes mean that you retain bad data, but that also provides a high level of auditability to your models.


