

In the contemporary business landscape, decisions increasingly rely on data-informed insights. Consequently, the tools we employ to process and visualize this data play a critical role. Among these tools, KNIME and Power BI have emerged as key players, catering to the demands of this evolving landscape.
KNIME Analytics Platform is an open-source data analytics tool that enables users to manage, process, and analyze data. Microsoft Power BI has established itself as a premier data visualization product used to turn unrelated data sources into coherent, visually immersive, and interactive insights.
Both tools serve distinct phases within the data analytics process, making their integration a highly advantageous proposition.
In this blog, we will focus on integrating Power BI within KNIME for enhanced data analytics.
KNIME and Power BI: The Power of Integration
The data analytics process invariably involves a crucial phase: data preparation. This phase demands meticulous customization to optimize data for analysis. Consider a scenario: a data repository residing within a cloud-based data warehouse. While it’s meticulously optimized for storage, it’s not being optimized for analysis. KNIME has become a handy tool to prepare and optimize the data.
Microsoft Power BI is a dynamic and interactive data visualization platform primarily focusing on business intelligence. Part of the Microsoft Platform is advantageous for individuals accustomed to the Microsoft ecosystem, as it provides users with a smooth and intuitive experience, all within a recognizable interface.
The integration of Power BI and KNIME holds the potential to streamline and automate workflows, along with the seamless creation of insightful dashboards.
KNIME Power BI Integration
The KNIME Power BI Integration allows you to directly push KNIME tables into Power BI datasets, circumventing the need for file exports. Configure the workflow and the report to refresh as needed so users can execute the data analytics process requiring just a few clicks.
The integration includes only two nodes. The first establishes a connection with your Microsoft account, facilitating the link between KNIME and Power BI. The second node offers a straightforward choice: either the creation of a new dataset or the option to update/overwrite an existing one.
NOTE: This Integration doesn’t work for Power BI Desktop.
How to Install The KNIME Power BI Integration
KNIME Analytics Platform allows users to install hundreds of useful extensions. Installing extensions is straightforward and can be done directly within the KNIME Analytics Platform. The Power BI Integration extension is not included in the standard KNIME installation, so it needs to be added manually.
Here’s how to do it:
With the KNIME Analytics Platform open, navigate to the top-right corner and click on the i icon. Then scroll down and select Install Extensions.
NOTE: Step 1 is specific for KNIME version 5.1. Older versions using the classic UI will find the Install Extensions menu under the File menu.
In the menu, use the search bar to type in a keyword, in this case, “Power BI,” and select the extension. Once you have found the extensions you wish to install, press Next through a few menus and accept the license agreement.
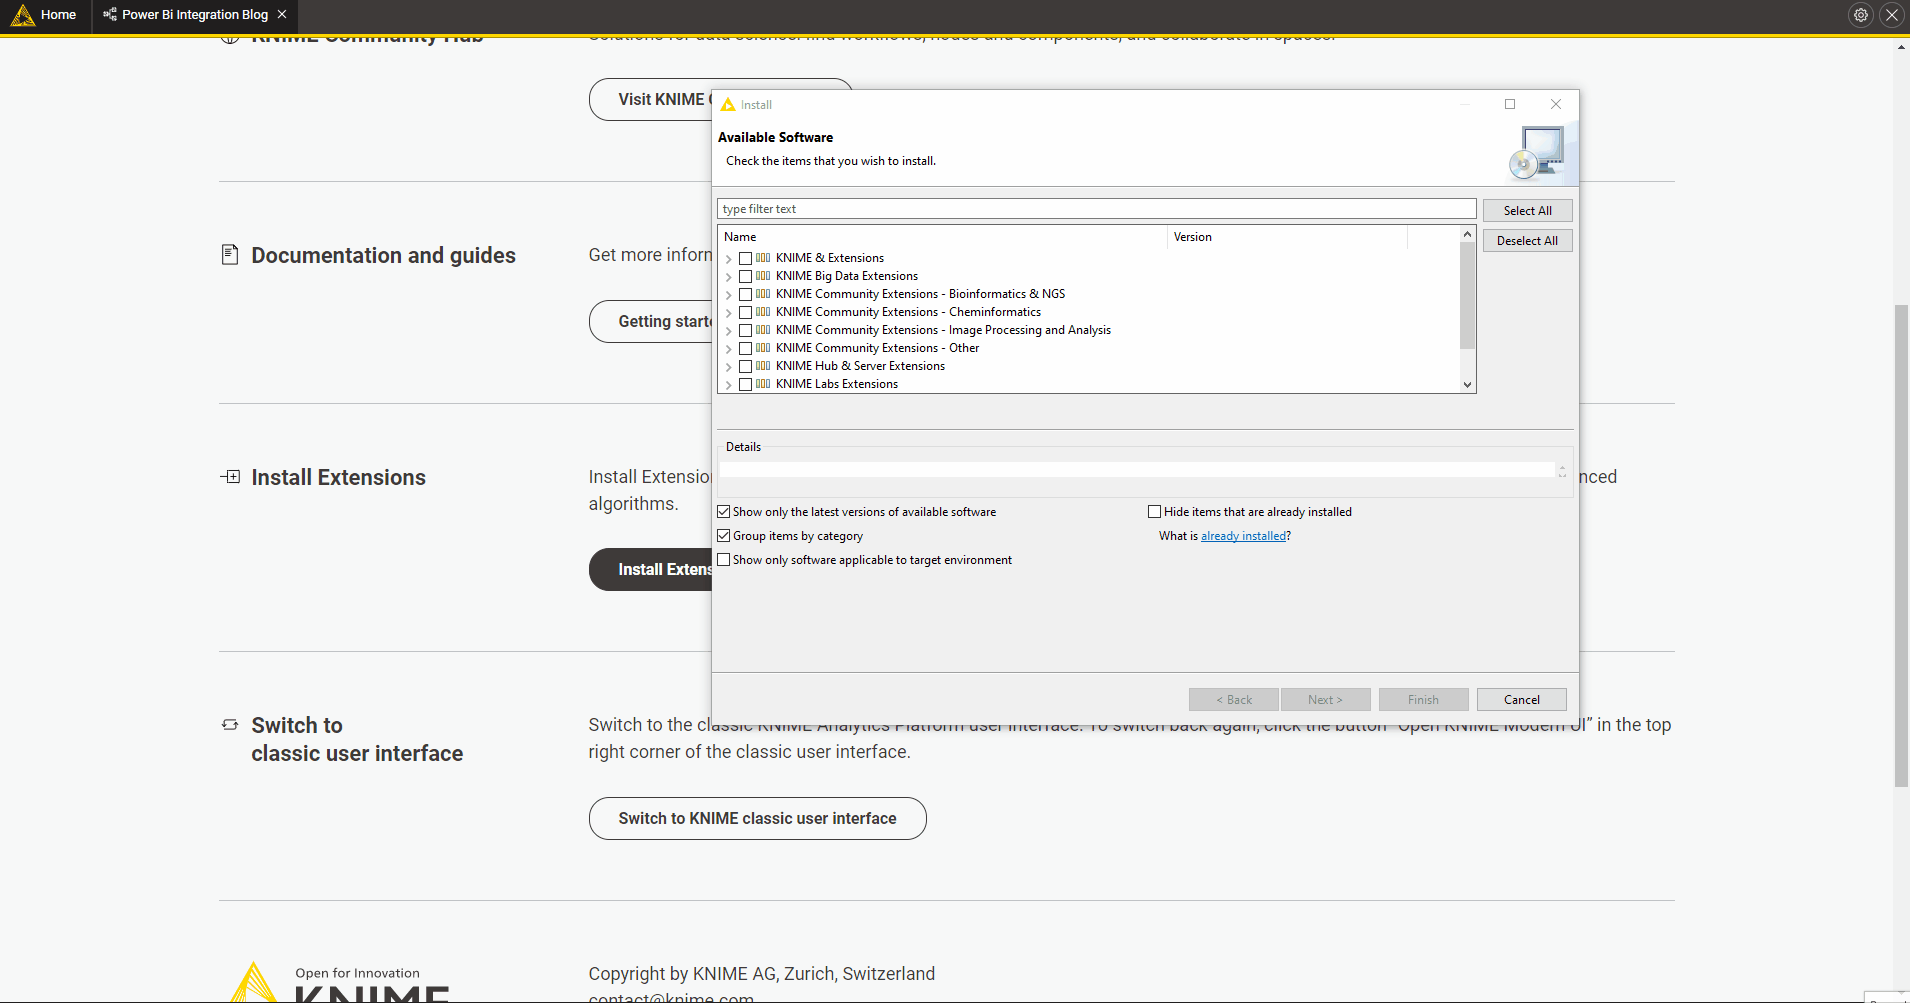
Press Finish and allow KNIME to install the selected extensions. Once the installation is complete, restart KNIME. You will see your new extensions in the Node Repository when it reopens.
How to Integrate Power BI Within a KNIME Workflow
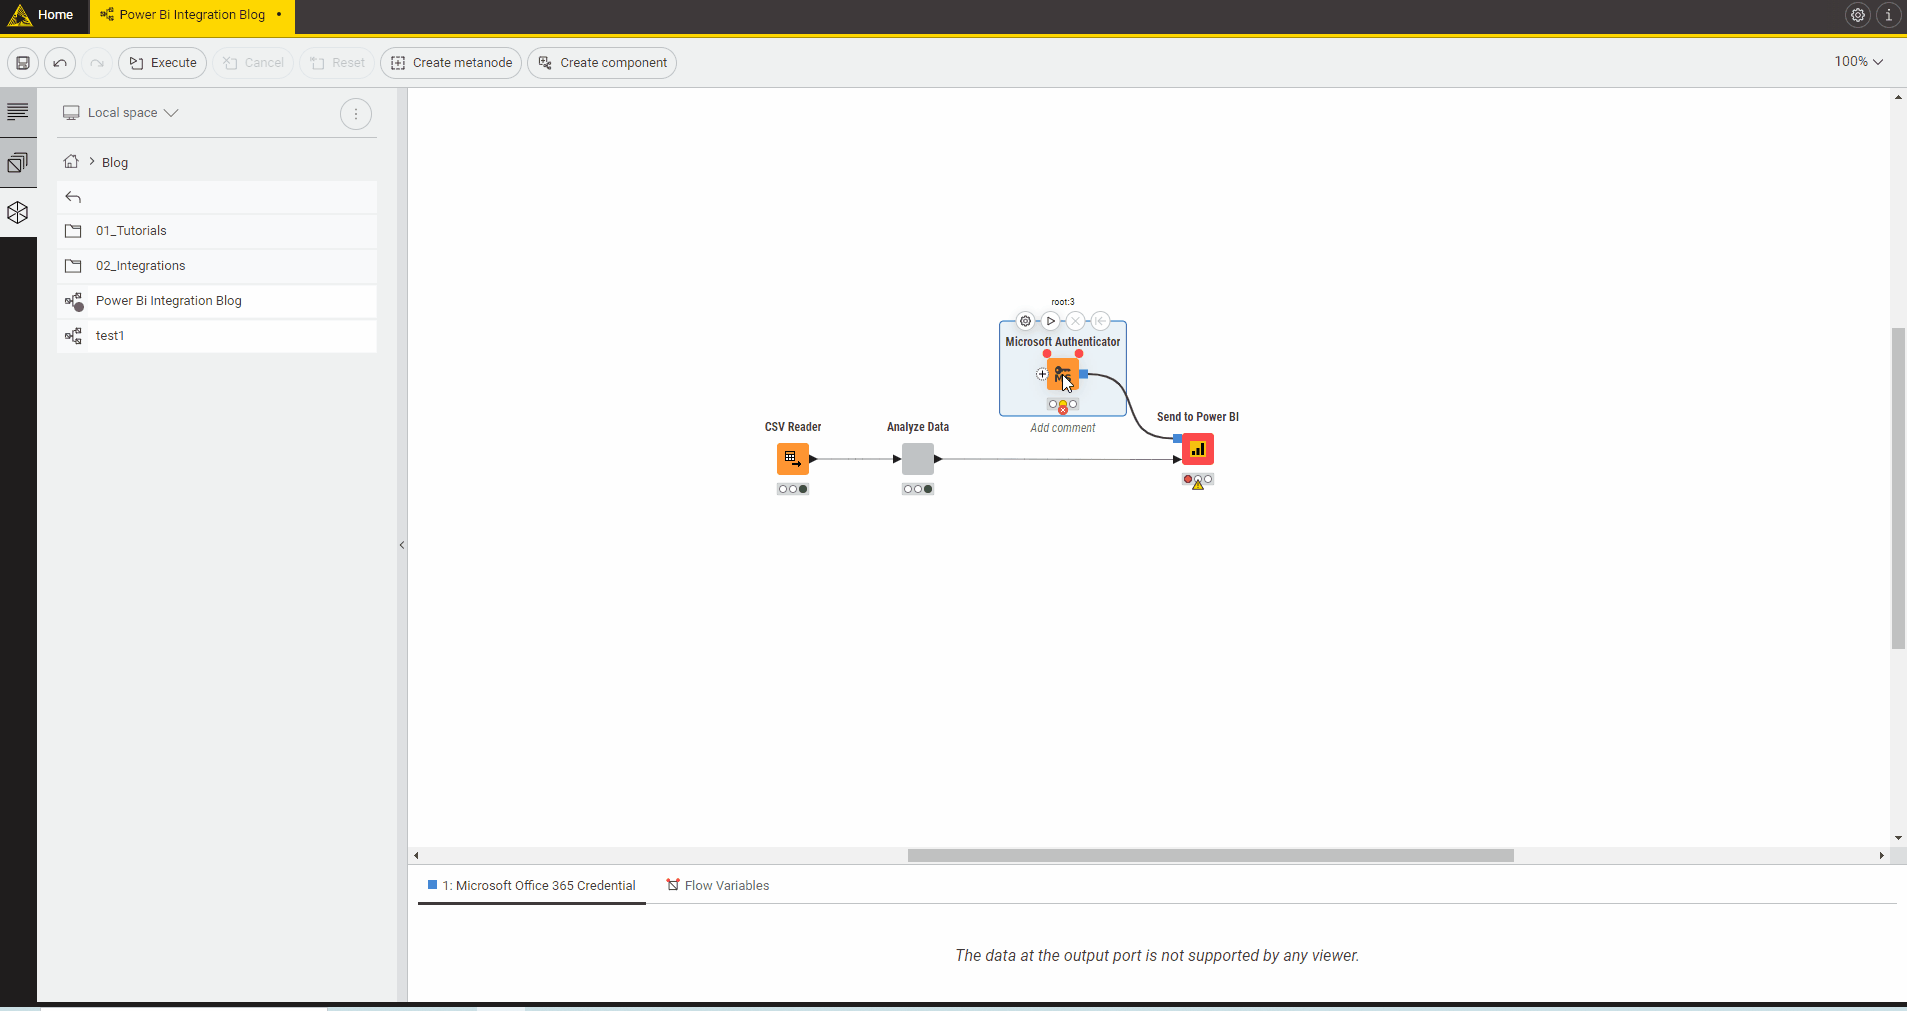
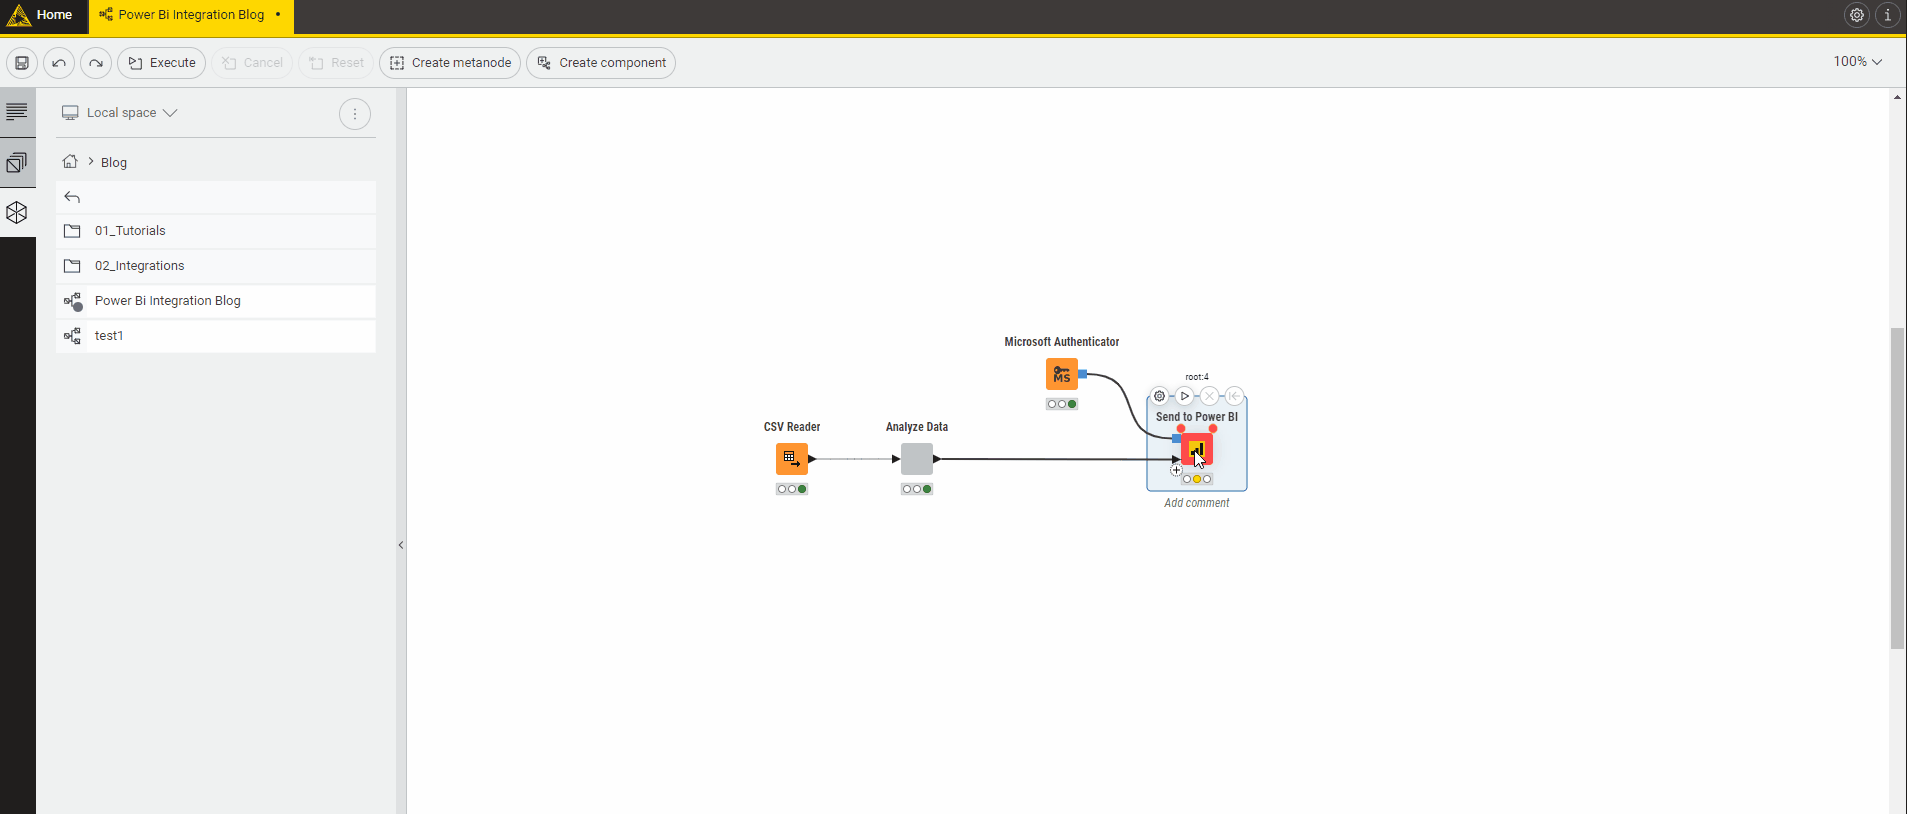
Drag and drop the Send to Power BI node & Microsoft Authenticator node and connect them to the workflow.

Open the Microsoft Authenticator Node.
On the bottom section, “request access to,” select the Power BI option.
Then go to the top section. You have different authentication options and recommend Interactive Authentication, which opens a web browser window with a Microsoft Login form. Fill out your username & password, and you will see a confirmation message.
Go back to the node configuration. On the token storage section, you have three options on how to save the authentication:
Memory: The authentication credentials will be kept in memory. They are discarded when closing the KNIME Analytics Platform.
Local File: The authentication credentials will be saved and loaded to and from the selected file.
Node: The authentication credentials will be saved in the node settings. If you choose this option, the workflow will contain your authentication information after it has been saved.
Click OK and execute the node.
-
Open the Send to Power BI Node.
-
On the Workspace input, select the desired one. Note that “default” indicates your personal workspace, which is called “My workspace” in the Power BI web interface.
-
You have two options when selecting the dataset.
-
-
-
-
Option 1 – Creating a new dataset: In your Power BI workspace, select Create New Dataset and choose a dataset and table names. If a dataset with the same name already exists, you can check the option Delete and create new if dataset exists.
NOTE: The delete option will also delete reports and dashboard tiles that are linked to the dataset.
-
Option 2 – Updating an existing dataset: To update an existing dataset in your Power BI workspace, select Select existing Dataset and use the checkboxes to select an existing dataset. You can choose if you want to append the rows to the existing tables or if you want to overwrite the existing rows.
-
-
-
-
Execute the workflow. Check your Power BI Workspace!
-
Note that the dataset has to be a Push dataset. See the Power BI documentation. You can check if a dataset is a Push dataset by checking the value in the API ACCESS column in the dataset list of the Power BI service.
How to Handle Large Datasets and Multiple Tables
One of the advantages of using KNIME is its ability to handle large datasets. Some tools, like Microsoft Excel, have row limits, which are about a million rows.
If you have a dataset that contains more than one table, you can customize the Send to Power BI Node.
Click the + button on the node and add as many ports as you need.
Connect the other tables to the node input ports.
Configure the table’s name.
Data Processing
Within KNIME’s toolkit, you’ll find an extensive array of nodes catering to data extraction, transformation, and loading (ETL). There are also nodes for machine learning, statistical modeling, text mining, and more. These advanced capabilities can significantly enhance your data preparation, allowing you to uncover deeper insights and create more meaningful visualizations.
Automation
KNIME allows users to create automated workflows. These workflows can be reused in your data preparation processes, amplifying efficiency. The KNIME Business Hub presents a dedicated platform for exchanging and reusing workflows.
Additionally, it boasts an advanced scheduling prowess, allowing users to automate KNIME workflows to execute at specified times or intervals. This proves particularly advantageous for recurrent data preparation tasks or updates and ensures that your dashboards are consistently updated with the latest data.
KNIME offers several options for the execution of workflows: Scheduled, REST APIs, Web Portal, etc.
Conclusion
The integration of KNIME & Power BI can enhance your data analytics process by preparing & analyzing data on the KNIME Analytics Platform and using Power BI for interactive visualization and reporting with only a few simple steps, unlocking the potential for a significantly more streamlined and efficient data analytics pipeline.
Your organization can leverage this powerful integration to make better-informed decisions and save time and resources. Take advantage of the power of this integration to make better-informed decisions.
Please contact us if you’re ready to take your data analytics process to the next level. Our team of experts can help you leverage the power of KNIME and Power BI, guiding you through the process of data preparation and visualization. Start your data journey today and transform your decisions with KNIME and Power BI.
FAQs
Power BI Desktop is always free. The Power BI service offers both free and paid license options. To download the free Power BI Desktop, see Get Power BI Desktop.
KNIME Analytics Platform is a free and open-source tool. To download KNIME, click here.
Using KNIME is incredibly easy. Its drag-and-drop interface allows developers to connect to data, perform manipulations and calculations, create interactive visualizations, and much more — without any need for coding. You can, however, code in Python, R, Java, JavaScript, or CSS within KNIME if you want.
Here are some tips for getting started.
Power BI is a collection of software services, apps, and connectors that work together to turn your unrelated sources of data into coherent, visually immersive, and interactive insights. Your data might be an Excel spreadsheet or a collection of cloud-based and on-premises hybrid data warehouses.
You can read about it on the Microsoft learning resources here.


