

Instead of sharing data only at predetermined periods of time – like at a meeting – or inconsistently around the water cooler, businesses can now share data in a more simplified and timely fashion through an integration between Sigma Computing and Slack.
Sigma Computing has made it easy to share data insights in Slack by sending a workbook or visualization digitally. Some examples of this kind of data sharing include reporting the previous day’s worth of sales each morning with your team; or dispatching out all the workbook details related to a big sale that just took place.
In this blog, we’ll walk you through how to successfully integrate Sigma with Slack.
What Does This Integration Do And Why Does it Matter?
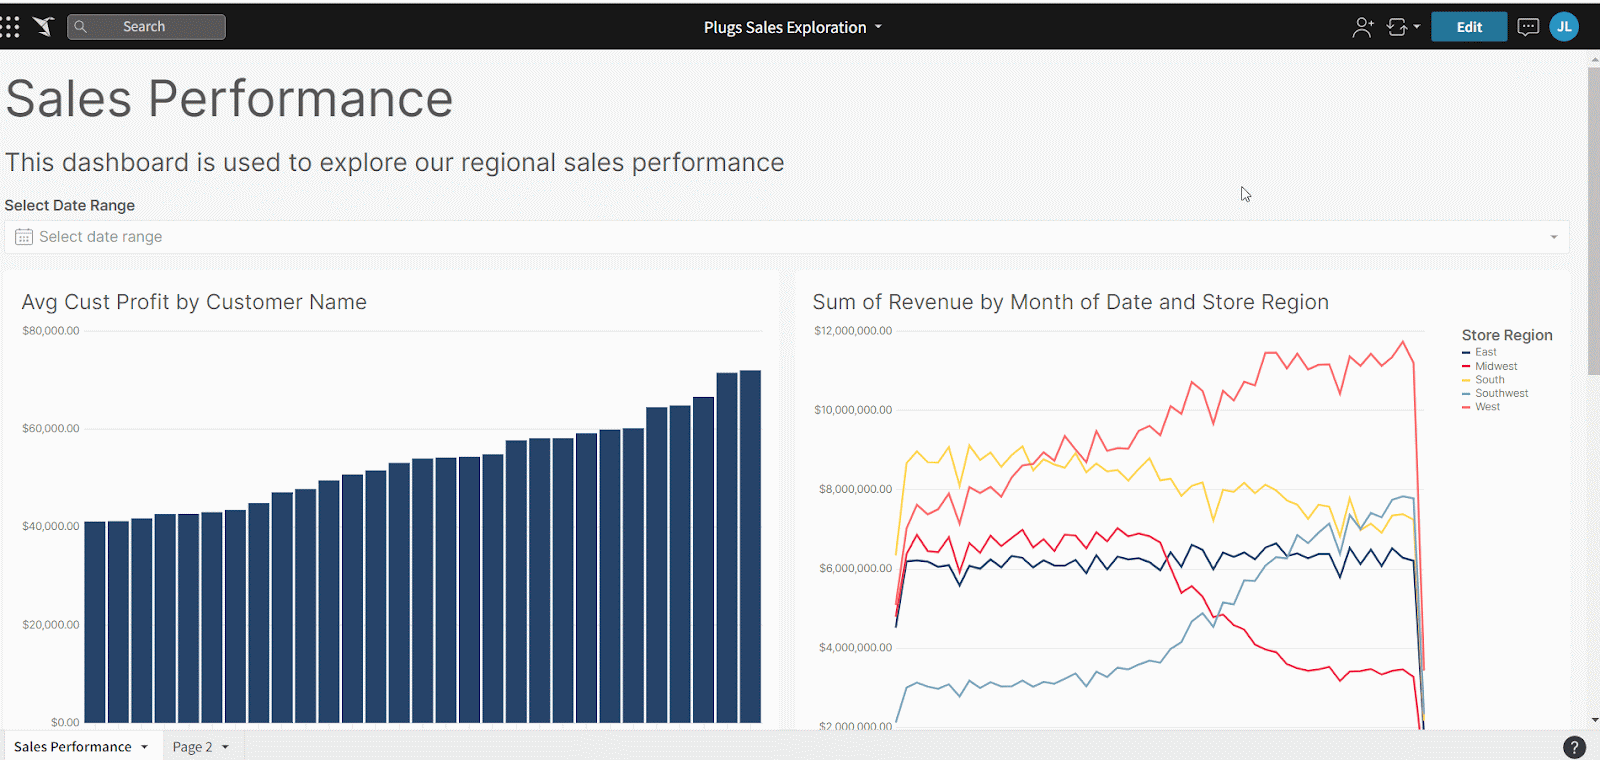
With this integration, Sigma can now communicate with Slack to provide snapshots of workbooks or other visual elements of your choice, like scatter charts or trellis charts. This functionality makes it easy to get and share data insights at regular, predetermined intervals of time or on demand in real-time.
How to Integrate Sigma Computing with Slack
Pre-Requisites
- Integration enablement can only be done by Sigma Admins in the Sigma workspace
- Once enabled, only Sigma Creators and Admins can send or schedule Slack messages
- The Slack Admin might need to approve the Sigma App before enabling this integration – this all depends on your organization’s Slack settings
If you are a Sigma Admin:
- Under the user menu found at the top right corner of the screen, select Administration
- This gets you to the Admin Portal in Sigma Computing
- Here, there is an Integration section
- Then, click Add next to the Slack integration
- This will shoot you to the Slack environment you are looking to add this integration in
- Click Allow when being asked to Authorize the integration.
If Sigma is already integrated:
Once Sigma is integrated into your Slack environment, you can either schedule an export or “send now…”.
First, we will be going over scheduling an export into Slack
- In your desired workbook, select the carrot found next to the workbook name.
- Select Schedule Exports.
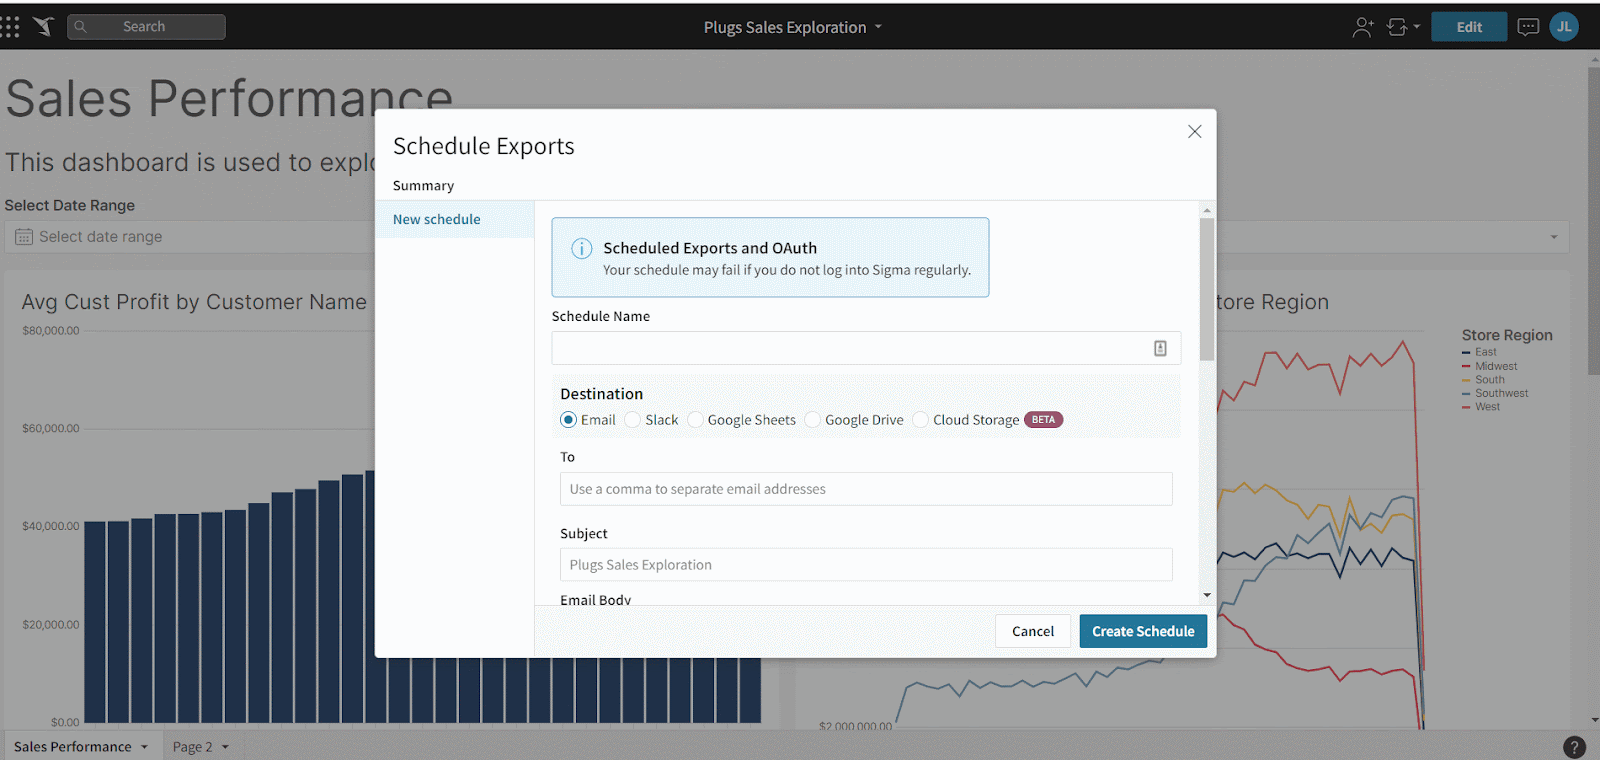
- If you have never scheduled an export before, you will find a window that says “No schedules exist for this workbook.” That’s okay, just click the button Add Schedule.
- If you have scheduled an export before, just click + New Schedule to add this new schedule for Slack.

On the next page, you will see a warning that states “your schedule may fail if you do not log into Sigma regularly.” There IS a possibility of this happening, so be sure to log into Sigma often.
3. Under Destination, be sure to click on the Slack button.
4. Add a name to your desired export
- A) The above steps are out of order because the name of the export will be removed once you click on a different destination.
5. Add the channel name this export will be going into (make sure you add the # before the channel name).
- One thing to note is that if you want to export a workbook or element to a private channel, the Sigma App needs to be added directly to that channel.
- The way to do this is by using @Sigma into the desired private channel.
- Even though the Sigma App has already been added to the Slack environment you are looking to add this to, for a private channel, you still have to make this happen.
6. Write a quick message describing what the end user will be viewing.
- Although this is not a necessary step, it’s really helpful to the user to know what they are looking at.
- This is especially helpful if there are multiple exports going to the same channel.
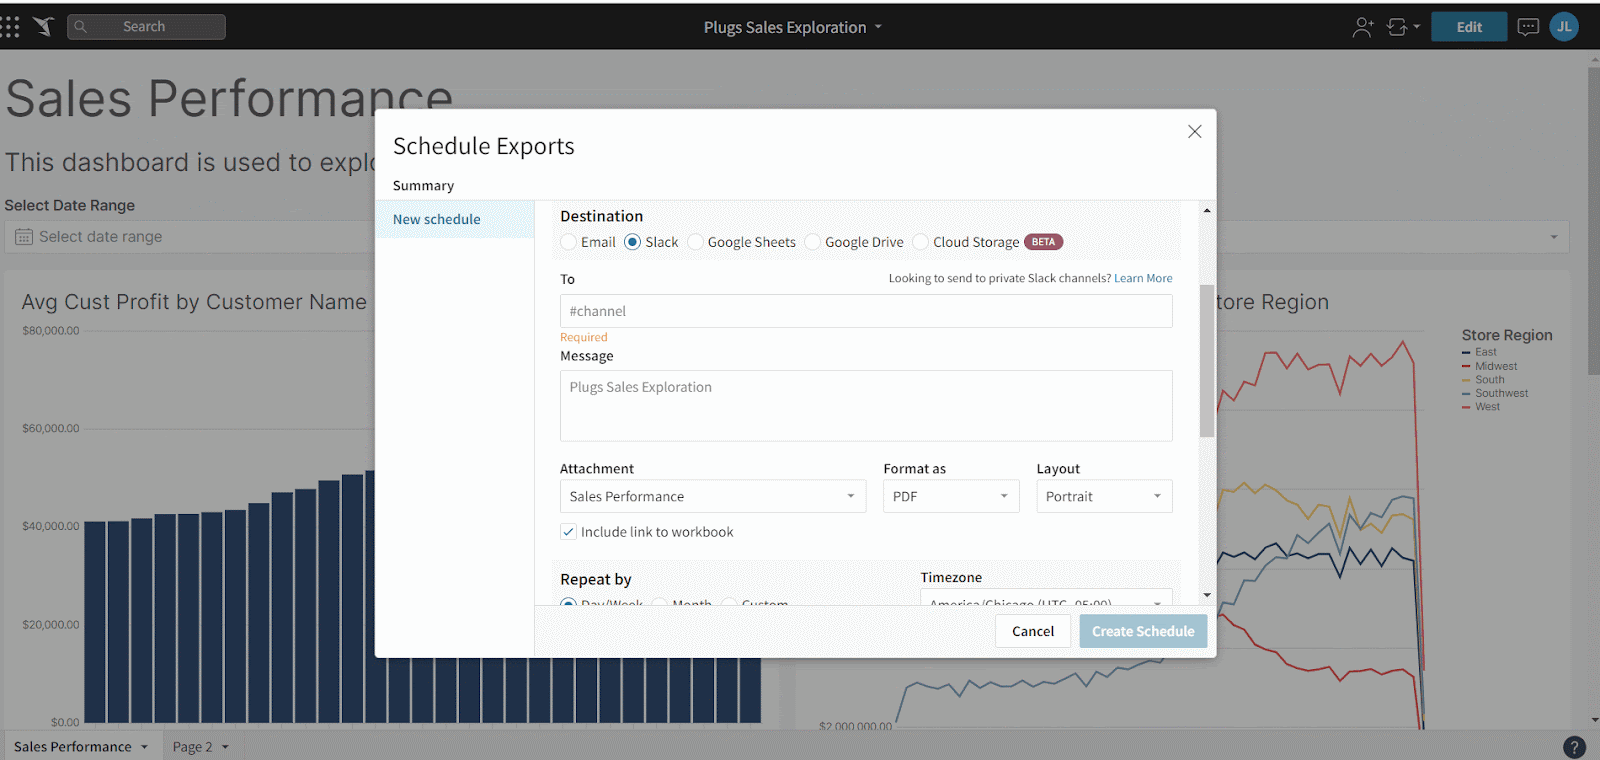
7. From there, you can select to export either the entire page or a specific visual.
- You can select which one by clicking the carrot under Attachment – the first option will be “Entire Page” and the rest of the options will be all the visuals found on the current page.
8. Under Format, you can select either a PDF or Image (default is a PDF).
- If choosing “Image,” step 9 does not show up.
9. Then, you can choose the Layout to either Portrait or Landscape.
- One thing to note is that you might have to play around with the format of the PDF. It can sometimes cut things out or squeeze things together, so testing it before scheduling will be important.
10. Before moving to the next step, you can uncheck the box next to “Include link to workbook” if you do not want your team to get directed there.
- It is checked already by default.
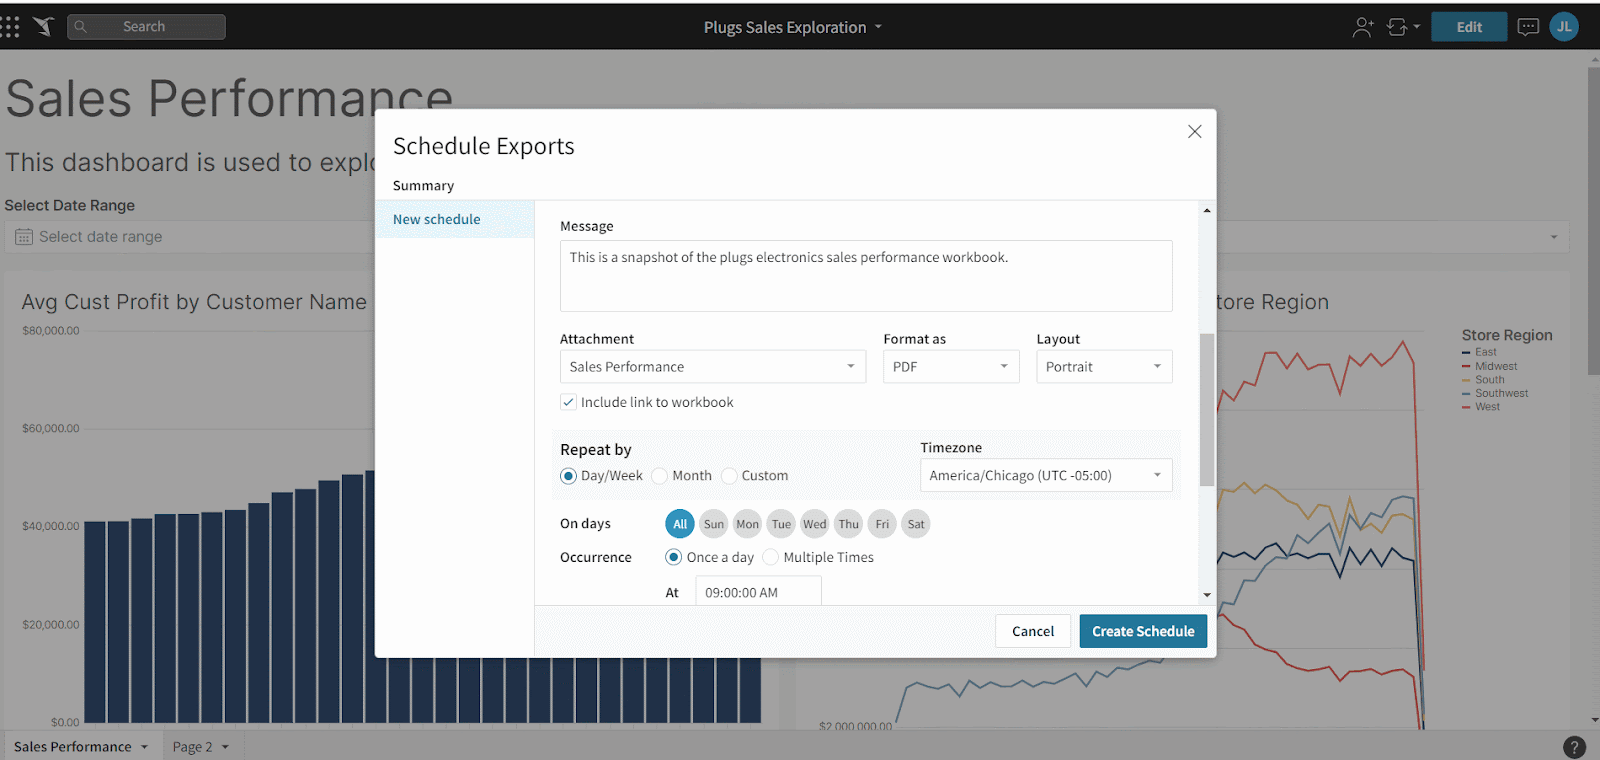
Next up is the section to actually create the schedule.
11. Under Repeat by, you can select Day/Week, Month, or Custom.
- When selecting Day/Week you have the options of On days and Occurrence
- Under On days, Sigma Computing gives you the ability to select “All” days, or specific days Sunday-Saturday.
- Under Occurrence, Sigma Computing allows you to choose either “Once a day” with a specific time you want. Or, multiple times where you set time intervals of hours and minutes and you get the option to select the limits of when the intervals should start.
12. Once you select how often you want the schedule to happen, you can choose what timezone you will want the scheduled post to go under in the section labeled Timezone.

13. From there, you have the option to select Controls, which are all the filters that you may have added to the workbook or element you have chosen.
- This allows you to look at the filtered view without having to go into the workbook itself to add these.
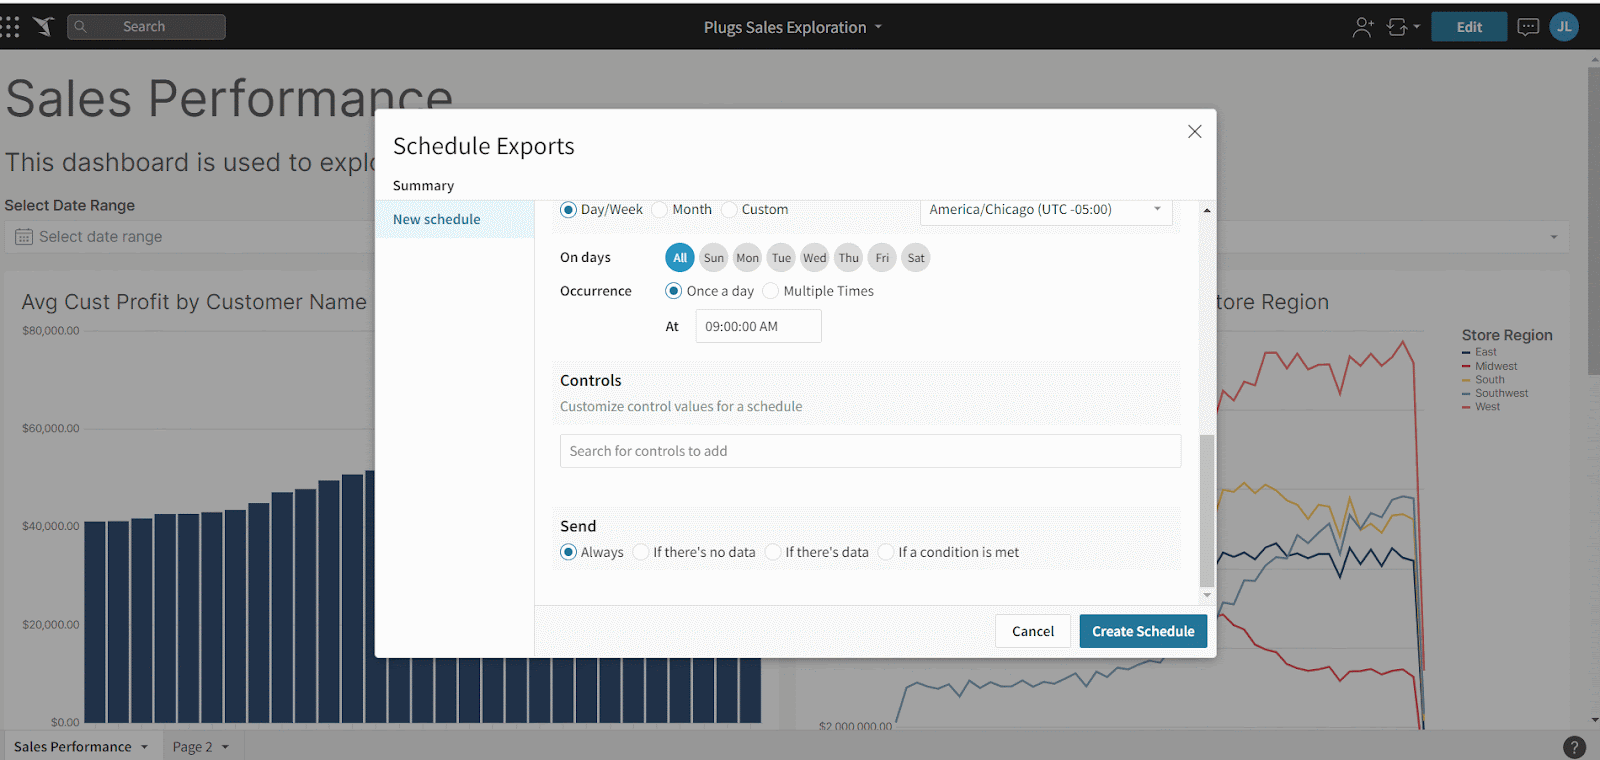
14. Lastly, you have to choose when to send the scheduled export.
- You get the option to “Always” send which means it will send regardless of any updates or non-updates.
- You can also send “If there’s no data,” which allows you to select what data element you want to check for no data. This option even lets you test the condition to see if it is met.
- Along with seeing if there is no data, Sigma computing also allows you to send an update if a certain condition is met. It allows you to choose the data element that you want the condition to look at. Then, you’re able to select if you want to look at any value or all values in that element. Lastly, you’re able to choose the column to check to execute this condition, along with the equation you want to look for and the value you’re using for said condition.
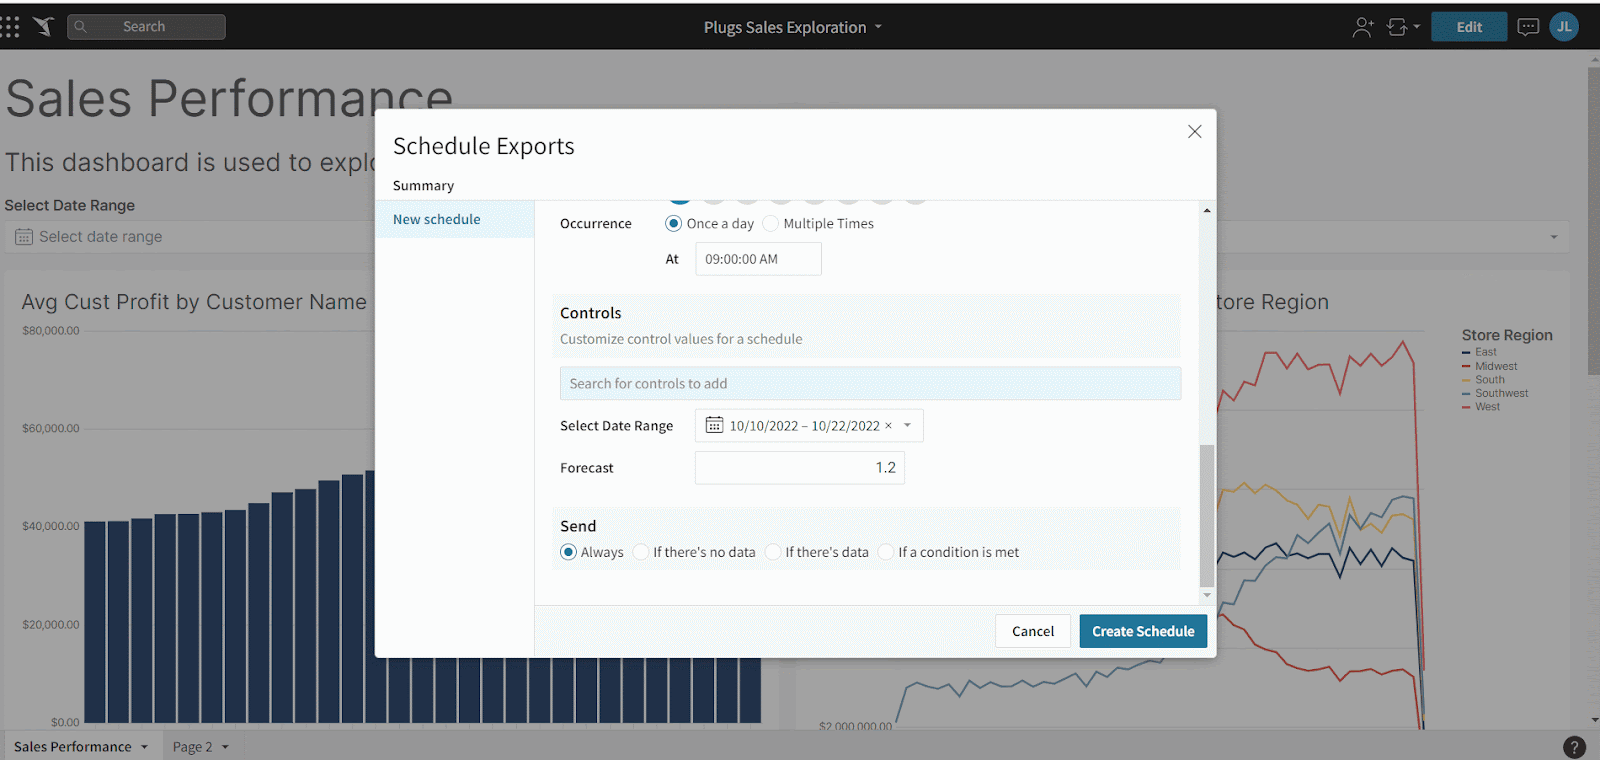
15. Once you’ve added all your criteria, click Create Schedule at the bottom of the page.
- From here, you will see a new page showing all your exports and whether or not they are active.

Moving On, We Will Be Sharing How To Send a Report to Slack in Real-Time (Also Known as “Send Now…”)
- In your desired workbook, select the carrot found next to the workbook name.
- Select Send Now…
- From there, you will get a new page where you will see the section Destination. Click on the button that says Slack.
4. You will then be asked to add the slack channel name you want this to go into (make sure to add the # before the name or you will get an error message).
- One thing to note is that if you want to add this to a private channel, the Sigma App needs to be added directly to that channel.
- This needs to be done even though the Sigma App has already been added to the Slack environment you are looking to add this to.
5. The next section is to add a Message describing what the end-user will be looking at
- Although this is not a necessary step, it’s really helpful to the user to know what they are looking at.
- This is especially helpful if multiple exports are going to the same channel.
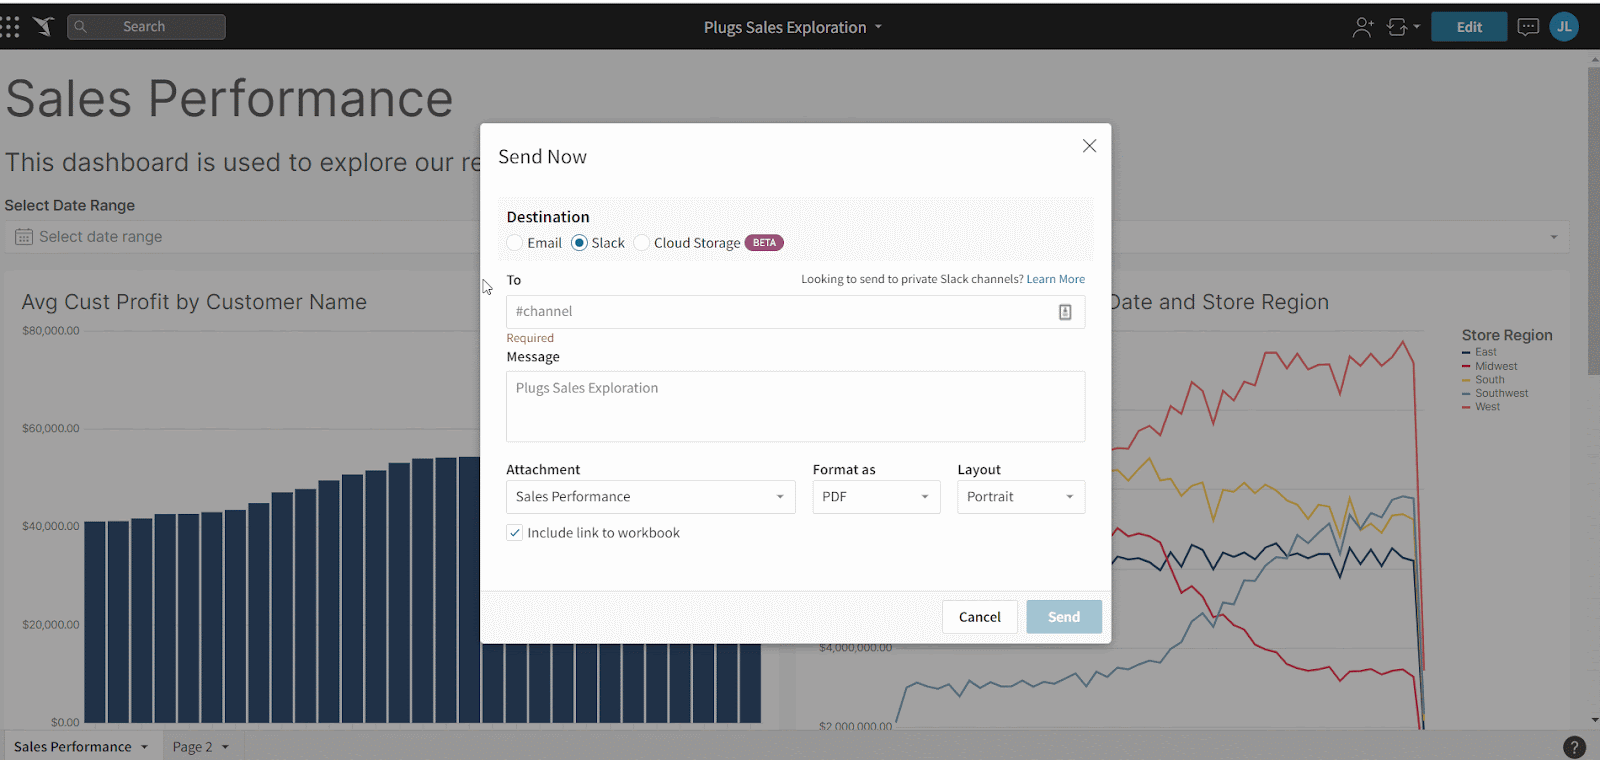
6. Then, you will be able to choose what the Attachment will be of.
- Choose either the entire page or a data element found in that page.
7. Under Format, you can select either a PDF or Image (default is a PDF).
- If choosing Image, step 8 does not show up.
8. Then, you can choose the Layout as either Portrait or Landscape.
- One thing to note is that you might have to play around with the format of the PDF. It can sometimes cut things out or squeeze things together, so testing it before sending it to your whole team will be important.
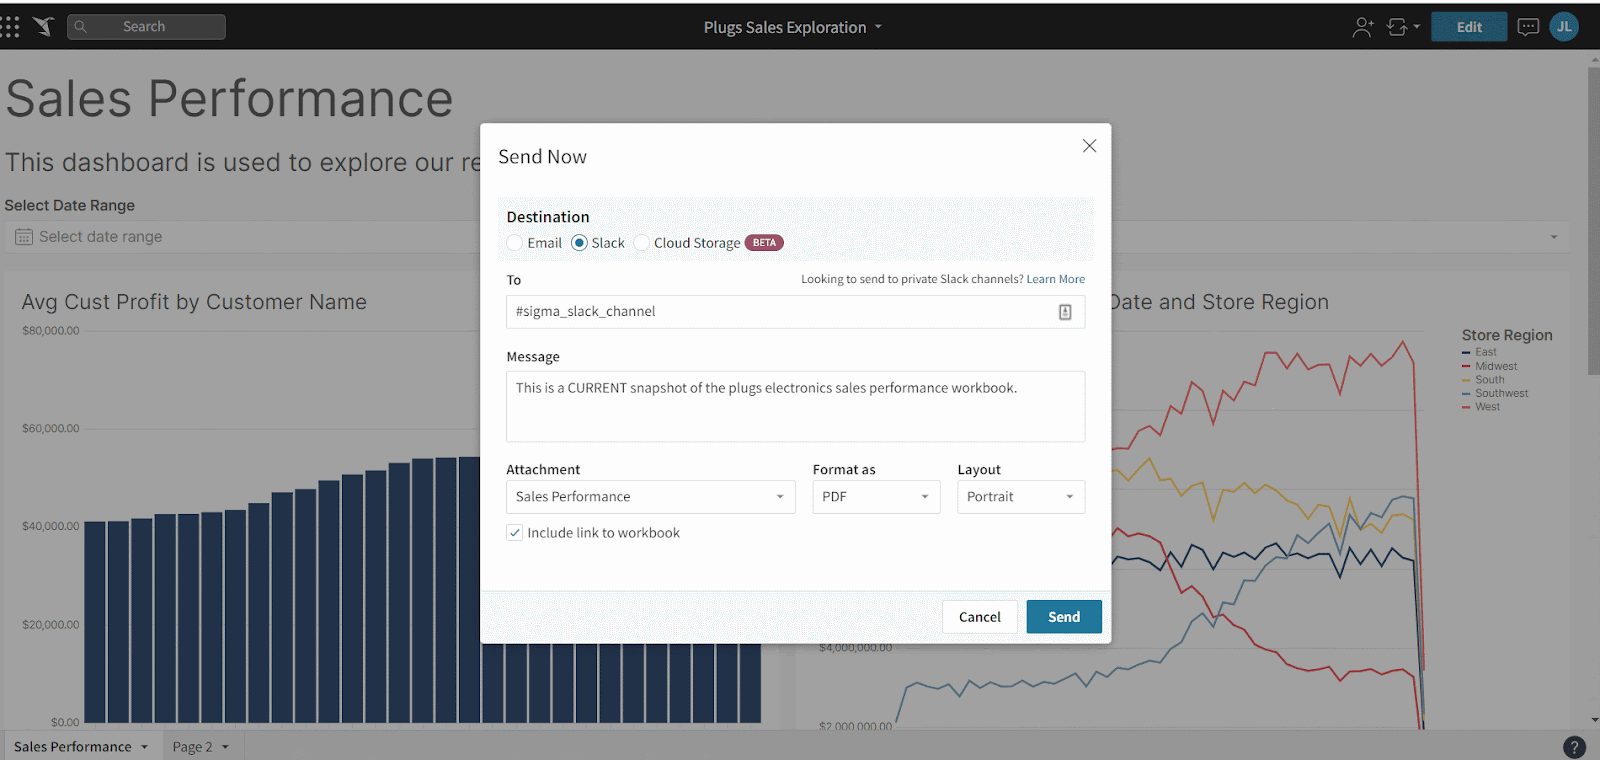
9. Before sending it, you can uncheck the box next to “Include link to workbook” if you do not want your team to get directed there.
- It is checked already by default.
10. Finally, click Send and you will have a version of the workbook or element instantly in Slack.

Closing
Sigma Computing has made it easy for users to share their workbooks or visual elements in Slack. By scheduling regular exports or sending them real time, your team can now have easier access to data insights.


