

This post is the third post in a series examining a whole host of game-changing Tableau Desktop features that have been released in 2020. In the previous post in this series, we covered Viz Animations from the Tableau 2020.1 release. In this post, we will dive into Set Controls which were released in Tableau Desktop 2020.2.
When Set Actions were released in 2018.3, the Tableau community went crazy! Set Actions opened the door for a whole new set of possibilities that had been at developer’s fingertips, but hadn’t been realized yet. The new Set Controls feature is an amazing addition to Set Actions that makes them so much more customizable and developer-friendly. Let’s check out what Set Controls are and how to use them.
What are Set Controls?
In order to first understand Set Controls, you must understand what a Set is. A Set is a way to group values within a field in Tableau as either part of an IN group or OUT group. If one of your data set fields is U.S. states, and you add Ohio, Kentucky, and Indiana to your Set, you are grouping these three values together as being part of the IN group, or the group you want to analyze.
Placing these values within a Set allows you to call these three values more easily when conducting analysis. Before Tableau Desktop 2018.3, once you defined the values in a Set, that was it, those were the values. Set Actions allowed you to add values to that Set with a click of your mouse.
Now, Set Controls allow Tableau users to be very specific about what kind of editing to a Set they are doing when running a Set Action. Previously, Set Actions had one direction for editing the Set: adding values. If you had a Set Action and clicked on another value, it would add the value to your Set. You had an option to clear all values, keep values, or remove all values from the Set. Now, you are not only able to control the functionality when clicking OFF of your selection, but you can control the functionality when clicking ON your selection.
How to Use Set Controls
Tableau’s developers made using Set Controls fairly straight forward. Let’s jump right into how to add this feature to your dashboard. After you have created a Set and want to apply actions to it on a dashboard, go to Dashboard → Actions → Add Action → Change Set Values. The menu below will pop up.

Most of the menu should look familiar if you’ve used Tableau Desktop 2018.3 or later. You need to assign which sheets in your dashboard the action originates from and how to activate it (Hover, Select, Menu). Then, you need to define which data source the Set is referencing. Next, you must select what Set you want to change the value for and what happens to the Set values when clicking off of your selection. The new features in this menu are in the Running the action will section.
- Assign values to set – this makes whatever value you select the only value in the Set, essentially assigning that value as the IN value
- Add values to set – this adds whatever values you click on to your Set
- Remove values from set – clicking on a value will remove it from the Set that is being referenced.
With these new Set Controls, it important to understand how the combinations of Running the action and Clearing the action will interact with one another. Different combinations of these actions will allow you to do certain things and restrict you on others. Let’s see how each combination behaves.
In the table below, the columns are the different Running the action options and the rows are the different Clearing the action options.
Keep set values | Add all values | Remove all values | |
|---|---|---|---|
Assign values to set | Assigns only the selected value as IN the set, will keep that one value as IN when clicking off. | Assigns only the selected value as IN the set, clicking off will add all values back as IN set. | Assigns only the selected value as IN the set, clicking off will make all values OUT of set. |
Add values to set | Adds all values clicked as IN set, clicking off will keep all values clicked as IN set. | Adds all values clicked as IN set, clicking off will add all values OUT of set as IN set. | Adds all values clicked as IN set, clicking off will move all values to OUT of set. |
Remove values from set | Moves values to OUT of set when clicking on them, clicking off will keep those values as OUT. | Moves values to OUT of set when clicking on them, clicking off will add all values back as IN set. | Moves values to OUT of set when clicking on them, clicking off will move all values not already OUT of set to OUT. |
In the table above I have put the combinations in bold that I find most practical. Hopefully this table will allow you to determine which combination of actions is right for your use case. Now let’s see these Set Controls in action!
Set Action Examples
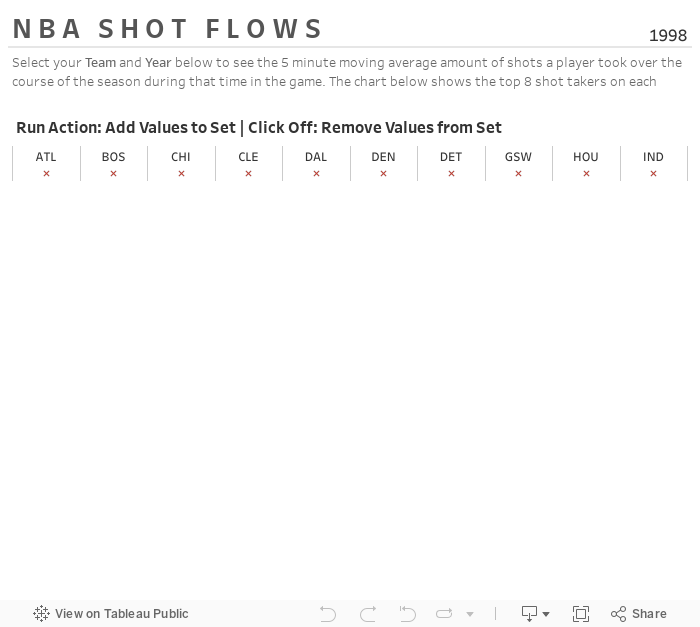
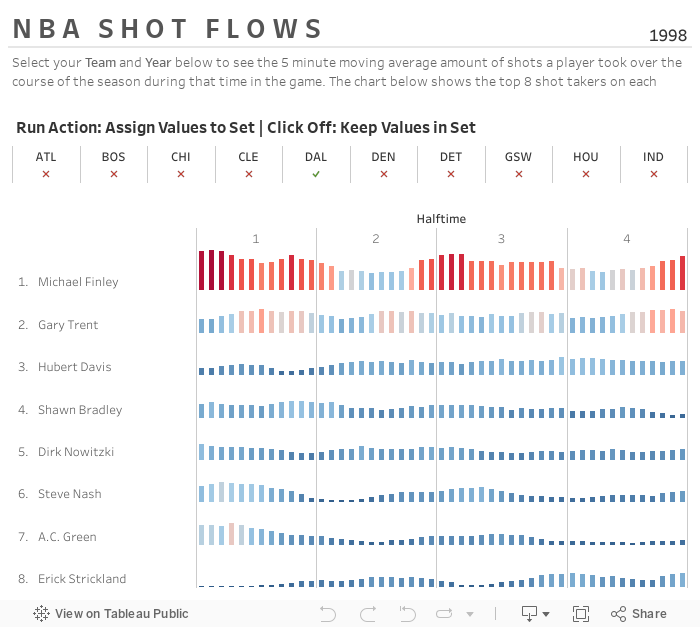
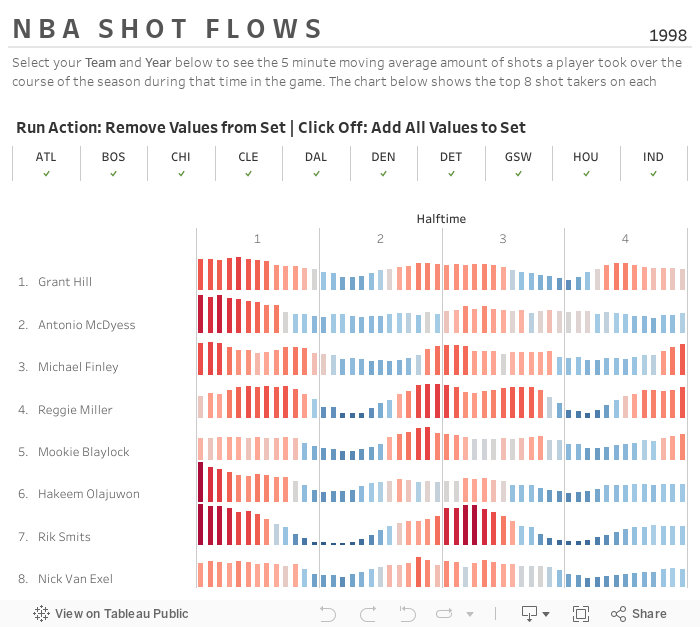
Now that you understand the new Set Controls and how to create them, let’s look at some examples in action to drive this concept home. We will use a visualization showing the moving average of shots NBA players took during different points in their basketball games. For the sake of this example, I limited the amount of teams and set the year to 1998.
This first example Adds Values to Set when running the action and then Removes Values from Set when clearing the selection. As you can see, there are no current values in the Set. This makes sense because unless a value has already been selected, then you will most likely end up with no values in your Set using this clearing selection.
Click on an x to add it to the Set. You can keep clicking on different teams to add them to the Set, but once you click off, all of them will be removed.
Our second example uses Assign Values to Set when running the action and then Keeps Values in Set when clearing the selection. As you can see below, there is already a value selected. This makes sense considering we have selected to keep the value in our Set when clicking off. Remember, since this is Assign Values to Set instead of Add Values to Set, there will be only one value in the set at any time.
Click on any of the teams below to see their shot patterns from the 1998 season. Clicking off will preserve your selection.
Our last example will Remove Values from Set when running the action and then you will Add All Values to Set once you click off of your select. Since we are adding all values back to the Set upon clearing our selection, the visualization below starts with all of the teams showing as IN our Set.
Click on different teams below to remove them from the Set. You can keep clicking on teams to remove multiple values from the Set, but when you click off the selections, all of the teams will be added back.
Hopefully these examples have helped you see how these Set Control combinations of Running the Action and Clearing the Selection can be used to view your data the way you desire.
Using Sets
In addition to Set Controls, this release now allows you to Show Set much like you’re able to show a filter. Right-click on your Set in any screen and then you will see the familiar menu pop out, except now you can click Show Set. The members of the Set will be listed just as a filter would. See below.


With any cool new feature, there are some caveats. Using Sets can be a neat way to analyze your data, but they can also have a serious effect on your dashboard’s performance, especially when using Set Actions. So just be careful when using Sets, Set Actions, and Set Controls to also factor in your dashboard performance and see if there are other ways of accomplishing the same task. Otherwise, enjoy this cool new feature!
Do you have more questions about Tableau? Talk to our expert consultants today and have all your questions answered!


