Creating a custom dbt materialization is an advanced and complicated process. It involves multiple steps, including multiple interactions with the underlying data platform.
In this blog, we will learn how to build one step by step, with thorough explanations.
When Do We Need to Create Custom Materializations?
dbt provides some out-of-the-box materializations that might cover almost all use cases, but they can fall short on rare occasions. A prime example of this is automating repetitive code performed in many models or implementing a new feature introduced in your cloud data warehouse. Custom materializations come in handy in such cases.
Since it’s a very advanced and complicated process, if your use case is supported by one of the out-of-the-box materializations, please use that instead of creating a custom one. Sometimes, a materialization and hook combination can solve your problem, rendering the need for custom materialization invalid. One notable downside of creating a custom materialization is that you become dependent on maintaining it yourself once you’ve created it.
How to Create Custom Materialization
Materialization defines where and how to store the output data from the models. This blog mainly concerns the ‘how’ part. We will understand that with an example scenario.
Let’s say we want to know when a record gets inserted/updated into a table. We must add a column to that table with the timestamp of when the records were inserted/updated. We can add this logic to our model code without any problem.
Let’s say we have hundreds of tables needing the same column. We could go to every model and add that same logic, or we could create a custom materialization by adding this logic and then using that materialization for all the models. This won’t be as difficult as with dbt, and we can set materializations at the folder level so all the models within that folder will have the same materialization behavior.
We have taken a very simple scenario to help understand. In the real world, the requirements can get very complicated. Custom materialization can prove to be very useful in these cases.
Let’s take our simple scenario of adding the timestamp column to the models to build our first materialization. We will add the _etl_load_ts column with the current timestamp to all models using this materialization.
The Template
We will start by writing an empty materialization macro:
					{%- materialization <name>, adapter=<adapter type> %}
{% endmaterialization -%}
Parameters:
Param
name: is the name of the materialization. We will use this name with our models for thematerializedconfig.Param
adapteris the name of the adapter we are writing this materialization for. It depends on the database we will use for our project. If we are writing a generic materialization supported by all kinds of adapters, the value for this parameter will have to be set todefault. The adapter’s name (snowflake) must be passed in for any specific type of database, such as Snowflake.
Let’s name our materialization as with_load_ts. That will look like:
					{%- materialization with_load_ts, adapter='default' %}
{% endmaterialization -%}
The Storage
Let’s set up where to store the output data from our models.
So we need tables:
Temporary table: to store the model code output. We need to temporarily store the model output and add our additional
_etl_load_tscolumn on top of the data before loading it into the final/target table.Target table: to store the final output.
Let’s set these two table instances in the macro:
					{%- materialization with_load_ts, adapter='default' %}

{% set target_relation = this %}
{% set temp_relation = make_temp_relation(target_relation) %}

{% endmaterialization -%}
Let’s understand what’s happening in these two lines of codes:
In the dbt world, tables are referred to as relations.
Thiskeyword refers to the fully qualified name (database.schema.table) of the target table for the model.The
make_temp_relation()macro generates an instance of the temporary table (to prevent creating it), including its name with a default__dbt_tmpsuffix. It will be automatically deleted.
Note that many utility macros, such as make_temp_relation(), exist within dbt and provide easy standardization across materializations.
Scenarios
Now, we need to build the SQL statements. But before doing that, let’s consider some scenarios:
The target table does not exist in the database. In this case, we have to create it before loading the data.
The target table exists in the database: We can just load the data into it.
The target table does not exist
Fundamentally, the job of any dbt materialization is to set up and execute a set of SQLs using the model code. In our case, we need to set up the temporary table SQL first. We will use another predefined macro get_create_table_as_sql(temporary, relation, SQL). This macro returns a CTAS (create table as) SQL statement, and, as we see, it takes 3 parameters:
Param
temporaryindicates if the table will be created temporarily. Accepted values aretrueorfalse.Param
relation: is the name of the table that will be created. Since we want to create the temporary table, we will pass thetemp_relationvariable to it.Param
SQL: will be executed to create the table. Since the temporary table will be created out of our model code, thisSQLis the compiled model SQL, which you will find under thetarget/compiledfolder of your dbt project.
The final macro call looks like this:
{{- get_create_table_as_sql(true, temp_relation, sql) -}}
Once this macro is called, the CTAS statement, including the compiled model SQL, will be returned, which can be executed to create the temp_relation.
Since the target table does not exist, our next job will be to build the CTAS statement for it by simply selecting all the columns from the temp_relation and adding our new _etl_load_ts column. The following will be the code to create the target table:
					{% set etl_load_ts_sql %}
select
	*,
	current_timestamp() as _etl_load_ts
from {{ temp_relation }}
{% endset %}
Now that we have built the SQL to extract data, we will leverage the get_create_table_as_sql macro again to wrap it around with the CTAS clause. Since we will create our target table this time, it won’t be temporary. So, the first macro argument will be false. For the same reason, the second argument will be the target_relation variable instead of temp_relation, and the third one will be our new SQL from the etl_load_ts_sql variable. Let’s see what it looks like:
{{- get_create_table_as_sql(false, target_relation, etl_load_ts_sql) -}}
Just to clarify, we haven’t executed any SQL yet. We are just writing code to create a bunch of SQLs that will execute sequentially.
Finally, we will create a macro with_load_ts_initial_sql() and put all of these inside it so that we can just call this macro when we want to get all these SQLs. Let’s look at that macro now:
					{% macro with_load_ts_initial_sql(temp_relation, target_relation, sql) %}
    {{- get_create_table_as_sql(true, temp_relation, sql) -}}

    {% set etl_load_ts_sql %}
    select
        *,
        current_timestamp() as _etl_load_ts
    from {{ temp_relation }}
    {% endset %}

    {{- get_create_table_as_sql(false, target_relation, etl_load_ts_sql) -}}
{% endmacro %}
Target table exists
Even in this case, we will need the temporary table to store the data temporarily, and we will follow the instructions from the previous section to create it.
If the target table exists, we can insert the data into it. But before we can do that, we have to go through some steps. We have to extract the column names from the target table, and for that, we will use another predefined macro, get_columns_in_relation(), which is available under the adapter module:
{%- set target_columns = adapter.get_columns_in_relation(target_relation) -%}
This macro will extract information about the columns, like names, data types, etc. We just need the names of the columns to insert the data into them. Also, we will double-quote the column names:
{% set quoted_csv_columns = get_quoted_csv(target_columns | map(attribute="name")) %}
Here, we extract the columns’ names from the target_columns variable first with the help of the map() macro. Then, we pass that into the predefined get_quoted_csv() macro to get a comma-separated list of quoted column names, which we can use to build our next SQL statement.
Our next step is to build the SQL that will insert the data from the temp_relation that we have built as the first step into our target table:
					insert into {{ target_relation }}({{ quoted_csv_columns }})
select
	*,
	current_timestamp() as _etl_load_ts
from {{ temp_relation }}
Finally, just like the previous section, we will create a macro with_load_ts_append_sql() and put all of these inside it so that we can just call this macro when we want to get all these SQLs.
That’s all we need for this section. Let’s have a look at the whole section now:
					{% macro with_load_ts_append_sql(temp_relation, target_relation, sql) %}
    {{- get_create_table_as_sql(true, temp_relation, sql) -}}
    {%- set target_columns = adapter.get_columns_in_relation(target_relation) -%}

    {% set quoted_csv_columns = get_quoted_csv(
        target_columns | map(attribute="name")
    ) %}

    insert into {{ target_relation }} ({{ quoted_csv_columns }})
    select
        *,
        current_timestamp() as _etl_load_ts
    from {{ temp_relation }}
{% endmacro %}
Build SQL
We will use the codes we have developed in the above two sections to create our conditional statement, where the target table is created if it does not exist; otherwise, the data gets loaded into the existing table. But before doing that, we must check whether the target table exists. For that, again, we will use a predefined macro:
{% set existing = load_cached_relation(target_relation) %}
There is another thing we need to consider here. We have been building our SQLs so that they will append the data if the target table is already present in the database. What if we want to start fresh by creating the target table again?
The should_full_refresh() macro (predefined) can help us here. It works with the --full-refresh flag, and if specified with a dbt run/build, dbt will create the table again before loading the data. Simply, it will behave as if the target table does not exist.
With all this information, let’s set up our conditional statement:
					{% if existing is none or should_full_refresh() %}
    {% set build_sql = with_load_ts_initial_sql(temp_relation, target_relation, sql) %}
{% else %}
    {% set build_sql = with_load_ts_append_sql(temp_relation, target_relation, sql) %}
{% endif %}
SQL Execution
So far, we have been building the SQL code needed for our materialization but haven’t executed anything yet. We will call the already available statement() macro to do that:
					{% call statement('main') %}
	{{ build_sql }}
{% endcall %}
Hooks
Executing the SQL coming from the model is mostly at the core of any materialization, but it’s not enough. Our models sometimes have hooks that are supposed to be executed before/after the model SQL. We need to take that into account while building our materialization.
There can be two types of hooks (pre-hook & post-hook), and we will see how to handle them in the next couple of sections.
Pre-hook
Pre-hooks come through the model config key pre_hooks, and we can just execute the built run_hooks() macro. Since the pre-hooks are supposed to be executed before the model SQL, we will perform them before the execution of build_sql.
{{ run_hooks(pre_hooks) }}
Post-hook
We can execute the post hooks the same way we are executing the pre hooks with only two differences: 1. This one has to use the post_hooks key from model configuration to fetch the hooks SQLs, and 2. The execution has to happen after build_sql. The execution looks like this:
{{ run_hooks(post_hooks) }}
The Return
Dbt maintains a cache of relations it interacts with, which helps reduce the number of queries executed against information_schema. Since our materialization creates a relation (target_relation), it should return that relation to dbt so that dbt can update the cache. A dictionary with relations as key and the list of relations as value should be returned from a materialization:
{{ return({'relations': [target_relation]}) }}
First Version (v1)
Let’s combine all the above code snippets to create the first version of our materialization:
					{%- materialization with_load_ts, adapter = "default" %}

    {% set target_relation = this %}
    {% set temp_relation = make_temp_relation(target_relation) %}

    {% set existing = load_cached_relation(target_relation) %}
    {% if existing is none or should_full_refresh() %}
        {% set build_sql = with_load_ts_initial_sql(
            temp_relation, target_relation, sql
        ) %}
    {% else %}
        {% set build_sql = with_load_ts_append_sql(
            temp_relation, target_relation, sql
        ) %}
    {% endif %}

    -- Run pre hooks
    {{ run_hooks(pre_hooks) }}

    -- Execute SQL
    {% call statement("main") %} {{ build_sql }} {% endcall %}

    -- Run pre hooks
    {{ run_hooks(post_hooks) }}

    {{ return({"relations": [target_relation]}) }}

{% endmaterialization -%}


{% macro with_load_ts_initial_sql(temp_relation, target_relation, sql) %}
    {{- get_create_table_as_sql(true, temp_relation, sql) -}}

    {% set etl_load_ts_sql %}
    select
        *,
        current_timestamp() as _etl_load_ts
    from {{ temp_relation }}
    {% endset %}

    {{- get_create_table_as_sql(false, target_relation, etl_load_ts_sql) -}}
{% endmacro %}


{% macro with_load_ts_append_sql(temp_relation, target_relation, sql) %}
    {{- get_create_table_as_sql(true, temp_relation, sql) -}}
    {%- set target_columns = adapter.get_columns_in_relation(target_relation) -%}

    {% set quoted_csv_columns = get_quoted_csv(
        target_columns | map(attribute="name")
    ) %}

    insert into {{ target_relation }} ({{ quoted_csv_columns }})
    select
        *,
        current_timestamp() as _etl_load_ts
    from {{ temp_relation }}
{% endmacro %}
Test v1
Let’s try to use the first version of our newly created materialization. We have to start by putting the above code into an SQL file in the macros folder in one of our dbt projects, which will be executing the code against a Snowflake AI Data Cloud database. The file’s name can be anything, but we will name it mat_with_load_ts.sql for obvious reasons. Now we will use our with_load_ts macro for a couple of our models, i.e., we will set materialized in the model config to with_load_ts for these models:
+materialized: with_load_ts
Now, if we run the models, we should see the _etl_load_ts column present in the tables like this:

Note: It’s a good idea to refresh the models completely if you are trying to use the new materialization in an existing project.
Additional Elements
Since our basic implementation of the materialization works, we can add some extra elements to cover other aspects related to the materialization we have created.
Model Descriptions
Models can have descriptions. We can use the following snippet to capture that description:
{% do persist_docs(target_relation, model) %}
Configurations
Materializations can be designed to use configurations. You might have seen this with incremental materializations, such as on_schema_change.
Two types of configs are supported for materializations:
Required
Optional
Required
The required configurations must be provided with the model configuration. We can set up our materialization to receive the value of this configuration as below:
config.require('required_config_name')
Optional
Optional configurations have default values in case they are not provided with models. This is how we can extract value from it in our materialization:
config.get('optional_config_name', default="default value")
Since our materialization is very simple, configurations have little scope. Anyways, we can set the name of the column as an optional config:
{% set load_ts_column = config.get('load_ts_column', default="_etl_load_ts") %}
Now, we can use any name we want for that column by passing it through that config as below:
					{{
  config(
    materialized = 'with_load_ts',
    load_ts_column = '_load_timestamp'
  )
}}
Grants
The target table can have some grants defined for some user’s roles. When a relational object is replaced in this database, do previous grants carry over to the new object? This may depend on whether we use alter-rename-swap versus CREATE OR REPLACE user-supplied configuration (e.g., copy_grants on Snowflake). By default, we play it safe and assume True that grants are copied over. This means dbt will first “show” current grants and then calculate diffs.
					{% set should_revoke = should_revoke(existing_relation, full_refresh_mode=should_full_refresh()) %}
{% do apply_grants(target_relation, grant_config, should_revoke=should_revoke) %}
The should_revoke() macro will return True or False based on the following conditions:
Existing relation does not exist: So, no grants to copy over. Return
False.Full refresh is True: The object is being replaced. Whether grants are copied over depends on the value of the user config. Return a call to
copy_grants().None of the above: The table is being merged/upserted/inserted, and grants will be carried over.
The apply_grants() macro then creates a couple of grant lists and revokes statements that will be applied to the relation.
Precedence
Materializations can come from different sources. For example, dbt has out-of-the-box materializations, and DBT packages can also define materializations. So, we need to consider the precedence of the sources of materialization when creating one. It looks like this (lower has higher precedence):
global project – default
global project – plugin-specific
imported package – default
imported package – plugin-specific
local project – default
local project – plugin specific
Only one materialization can be defined with the same name in the above namespaces. Otherwise, dbt will raise an error.
Since there can be materializations with the same name in different namespaces/packages, they can be used using dot notations, like package_name.materialization_name.
Also, overriding the out-of-the-box materializations is not advisable, as the default one’s behavior will no longer be available. We can use a different name instead, like project_custom_incremental.
Final Version
Let’s see what our materialization looks like after adding the additional components:
					{%- materialization with_load_ts, adapter = "default" %}

    {% set target_relation = this %}
    {% set temp_relation = make_temp_relation(target_relation) %}

    {% set load_ts_column = config.get("load_ts_column", default="_etl_load_ts") %}

    {% set existing = load_cached_relation(target_relation) %}
    {% if existing is none or should_full_refresh() %}
        {% set build_sql = with_load_ts_initial_sql(
            temp_relation, target_relation, sql, load_ts_column
        ) %}
    {% else %}
        {% set build_sql = with_load_ts_append_sql(
            temp_relation, target_relation, sql, load_ts_column
        ) %}
    {% endif %}

    -- Run pre hooks
    {{ run_hooks(pre_hooks) }}

    -- Execute SQL
    {% call statement("main") %} {{ build_sql }} {% endcall %}

    -- Run pre hooks
    {{ run_hooks(post_hooks) }}

    {% set should_revoke = should_revoke(
        existing_relation, full_refresh_mode=should_full_refresh()
    ) %}
    {% do apply_grants(target_relation, grant_config, should_revoke=should_revoke) %}

    {% do persist_docs(target_relation, model) %}

    {{ return({"relations": [target_relation]}) }}

{% endmaterialization -%}


{% macro with_load_ts_initial_sql(
    temp_relation, target_relation, sql, load_ts_column
) %}
    {{- get_create_table_as_sql(true, temp_relation, sql) -}}

    {% set etl_load_ts_sql %}
    select
        *,
        current_timestamp() as {{ load_ts_column }}
    from {{ temp_relation }}
    {% endset %}

    {{- get_create_table_as_sql(false, target_relation, etl_load_ts_sql) -}}
{% endmacro %}


{% macro with_load_ts_append_sql(temp_relation, target_relation, sql, load_ts_column) %}
    {{- get_create_table_as_sql(true, temp_relation, sql) -}}
    {%- set target_columns = adapter.get_columns_in_relation(target_relation) -%}

    {% set quoted_csv_columns = get_quoted_csv(
        target_columns | map(attribute="name")
    ) %}

    insert into {{ target_relation }} ({{ quoted_csv_columns }})
    select
        *,
        current_timestamp() as {{ load_ts_column }}
    from {{ temp_relation }}
{% endmacro %}
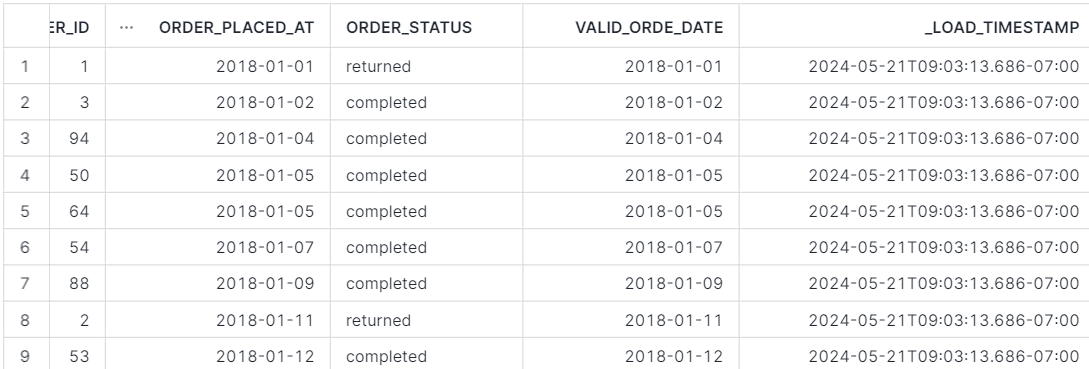
If we run a full-refresh of our model with config load_ts_column='_load_timestamp', we will see the result below:
Best Practices
To reiterate, it is advisable to use one of the out-of-the-box materializations if that solves your problem, and only in exceptional cases should you go through the process of creating custom materializations.
Sometimes, the use case can be solved using pre/post hooks along with a materialization strategy, and that’s what we should do instead of writing custom materialization.
Closing
dbt custom materialization is a powerful feature that allows data engineers to define how their models are built beyond the default strategies provided by dbt. With custom materialization, users can write SQL or Jinja code to specify exactly how and when their models should be materialized in the database.
This flexibility enables handling complex use cases such as conditional logic for materialization, specific performance optimizations, and custom refresh strategies tailored to unique business requirements.
By leveraging custom materializations, organizations can optimize their data workflows, ensure consistency, and enhance the scalability of their data transformations.
phData leverages dbt’s custom materialization to optimize your data workflows. We provide tailored solutions for efficient, scalable, and accurate data strategies. Contact our team of experts with any additional questions or if you need any assistance.


